
This article details how to set up an SPI port in Ubuntu Linux on the LTPP3(G2) using the PinMux library in Python. Note that the default username and password for Tibbo’s Ubuntu-derived distribution are both ubuntu — you will be asked for the password a few times throughout this process.
Hardware Requirements
- Size 3 Linux Tibbo Project PCB (LTPP3), Gen. 2
- Tibbit #00-1
- Tibbit #21
- Power adapter rated to at least 500mA
- USB cable with at least one Type-C connector
- Ethernet cable for connecting to your network
- USB flash drive or microSD card with at least 8GB of space
- Jumper (two if using a microSD card)
Software Requirements
- Image file of Tibbo’s Ubuntu-derived distribution for the LTPP3(G2)
- Visual Studio Code (VSC), with the following extensions:
- Remote - SSH
- Python
- Python Extension Pack
- IO Ninja
Preparing the Hardware
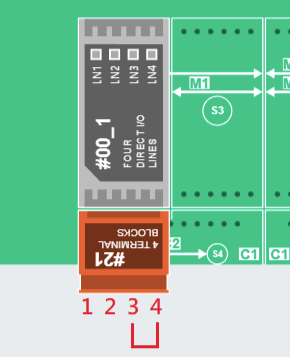
Place Tibbit #00-1 in socket S1 and Tibbit #21 in socket S2, as shown in the illustration below. Interconnect lines 3 and 4 so that data sent out will be looped back as input.
Upgrading the Linux Firmware
We highly recommend starting new projects using the latest version of our Ubuntu-based distribution. For instructions on upgrading the firmware on your LTPP3(G2), please refer to the “FAQ – How Do I Upgrade the LTPP3(G2) Firmware? ” article.
Connecting to the LTPP3(G2) Via Serial Terminal
First interconnect the board and your PC with the USB cable, then power on the device.
Next, open IO Ninja and create a new serial connection. Select the port of the LTPP3(G2) — which is labeled “Silicon Labs CP210x USB to UART Bridge.” The connection settings are 115,200bps, 8 data bits, no parity, and 1 stop bit. Open the connection and then click the Show Terminal button to see the serial terminal.
Updating Installed Packages
Regardless of whether you’re using an existing or fresh installation, we highly recommend that you update all installed packages before starting a new project.
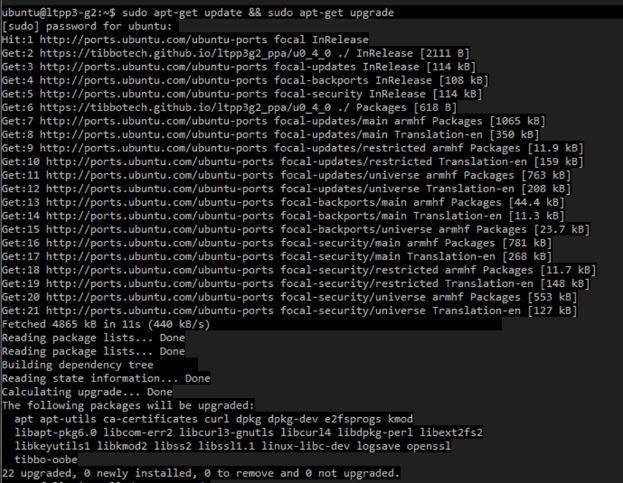
In the serial terminal, use the following command to update all installed packages: sudo apt-get update && sudo apt-get upgrade.
Once the process is complete, reboot the LTPP3(G2) by entering: sudo reboot now.
Finding out the Current IP Address
Before you can connect to the LTPP3(G2) through VSC over SSH, you’ll need to ascertain its IP address.
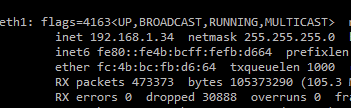
After logging in to the board, run ifconfig to get the device’s IP address — it’ll be the “inet” for either ETH0 or ETH1, depending on which Ethernet port you’ve plugged your Ethernet cable into.
Write down the IP address, as we’ll be using it shortly.
Connecting to the LTPP3(G2) in VSC Via SSH
In the left-hand menu, click Remote Explorer, then click Add New (the plus symbol).

In the prompt, enter ssh ubuntu@<your LTTP3(G2)’s IP address>. If this is the first time you use SSH in VSC, you will be prompted to select an SSH configuration.
Once the connection is established, a green connection status area should appear at the bottom left of the screen.

Installing Required Python Modules
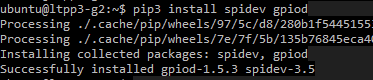
We need to install two Python modules to enable SPI. To install them, use the following command (either in the IO Ninja terminal or in a VSC terminal): pip3 install spidev gpiod.
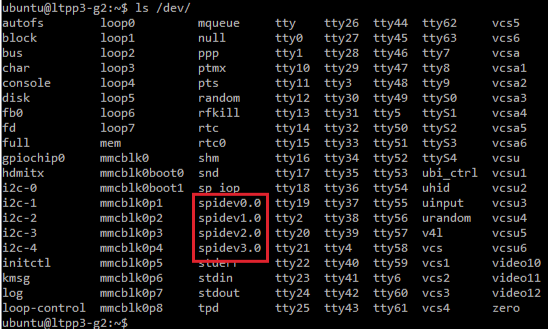
Once completed, you can check if the packages were successfully installed by running the ls /dev/ command; you should see spidev0.0~3.0.
Running the Sample Code
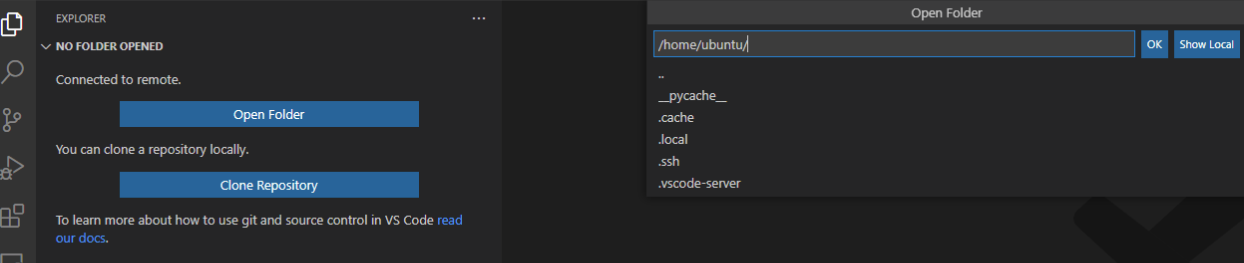
Now we can copy the spi_test.py file to the device. In VSC’s left-hand menu, click Explorer and then Open Folder. You can choose any location, such as /home/ubuntu.
Now, you can drag-and-drop the spi_test.py file into the directory in VSC. In your terminal, navigate to the directory you copied the file into and run: python3 spi_test.py.
In the terminal, you will see in the terminal the data output and input:

Comments
0 comments
Please sign in to leave a comment.